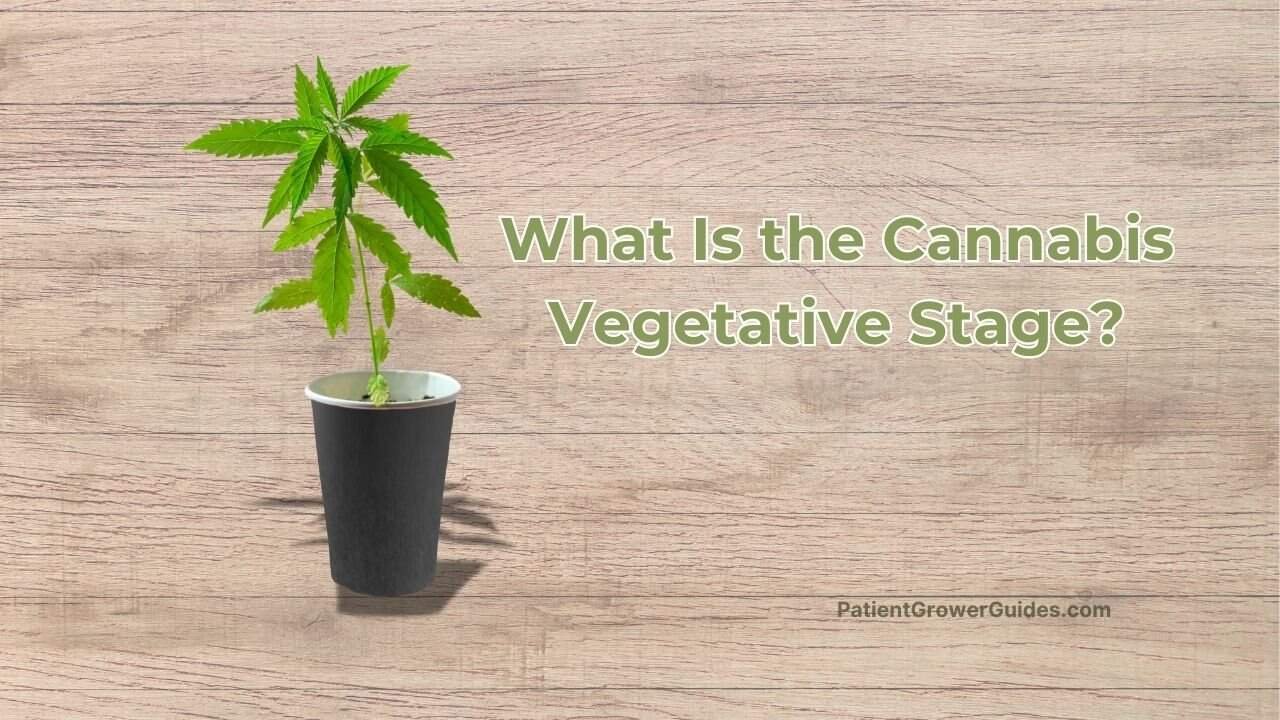
What Is the Cannabis Vegetative Stage? Everything I’ve Learned So Far
When I first decided to try growing my own medicine, I figured it would be simple: seed, dirt, water, right? Then I started doing my research and immediately hit a wall of jargon. People were talking about “flipping to flower,” “vegging out,” “the seedling stage,” and “lollipopping.” It felt less like gardening and more like trying to learn a new language on the fly.
Of all the new terms, the “cannabis vegetative stage” or “veg” kept coming up as this super important, long phase of the plant’s life. But what does it actually mean?
If you’re asking that same question, you’re in the right place. Since I’m starting this journey from square one, I’m doing all the research anyway. I decided to compile everything I’m learning into simple, no-nonsense guides for other beginners. This article is my deep dive into the cannabis vegetative stage – what it is, what the plant needs, and how long it lasts, all based on the hours of reading I’ve already done so you don’t have to.
This is just one piece of the puzzle, of course. For a full roadmap of every phase from seed to harvest, you can check out my summary on The Cannabis Life Cycle Explained. This article you’re reading now is a deep dive into just one of those crucial stages, and it’s all part of my main mission to document my entire first grow in our Growing Cannabis for Beginners guide.
So, let’s figure this out together. Here’s everything I’ve learned so far about the vegetative stage.
Table of Contents
What Exactly Is the Cannabis Vegetative Stage?
If you’re like me, you probably thought a plant is just… a plant. It gets bigger over time, and that’s that. But in the world of cannabis cultivation, the “getting bigger” part has a specific name and purpose: the vegetative stage. This is the plant’s adolescence and young adulthood all rolled into one. It’s the phase dedicated purely to rapid growth – building size, strength, and a leafy structure that will act as the factory for producing buds later on. Think of it as building a strong foundation before you try to put a roof on the house.
From Awkward Seedling to Leafy Powerhouse: When Veg Begins
One of the first things that tripped me up was figuring out when the seedling stage ends and the vegetative stage officially begins. Is there a specific day? A secret password? Thankfully, it’s not that complicated. A cannabis plant is generally considered a seedling right after it pops out of the soil (or its germination medium) and has its first little round leaves, which are called cotyledons.
I honestly had no clue when the seedling stage ‘officially’ ended. My research shows the general consensus is this: a cannabis plant enters the vegetative phase once it starts developing its first true leaves with multiple “fingers”—those iconic serrated leaves we all recognize. Once you see a few sets of these multi-fingered leaves and the plant is focusing on producing more of them, you can confidently say you’re in the veg state.
The Goal of Vegetative Growth: Building the Factory for Future Buds
So why is this stage so important? Because everything that happens here directly impacts the plant’s ability to produce quality buds during the flowering stage. The main goal of vegetative growth is to create a big, strong, and healthy plant. During this phase, the plant is focused on a few key jobs:
- Developing a strong root system: A robust network of roots is essential for absorbing water and nutrients.
- Growing a thick main stem and sturdy branches: This structure needs to be strong enough to support the weight of heavy buds later on.
- Producing tons of fan leaves: These big leaves are the solar panels of the plant, converting light into the energy needed for all this rapid growth.
Essentially, the more efficient this “factory” becomes during the vegetative growth phase, the better the potential for a successful harvest and robust bud formation down the line.
The Ideal Environment for Healthy Vegetative Growth
Alright, so we know our cannabis plant’s job during the veg state is to get as big and strong as possible. Our job as the grower is to create the perfect environment for it to do just that. Think of this as setting up the ultimate five-star resort for your plant, where it has everything it needs to thrive. From my research, it all boils down to four critical elements: light, temperature, humidity, and nutrients. Getting these right is the key to encouraging healthy vegetative growth.
Let There Be Light: Cracking the Code on Light Schedules
Light is probably the most critical factor. It’s not just for illumination; it’s the food and energy source your plant uses to grow. This is where you’ll see numbers like “18/6” or “24/0” thrown around.
When I first heard “18/6 light cycle,” I immediately worried about my electricity bill. Leaving a powerful light on for 18 hours straight sounded intense! But here’s the simple breakdown: during the vegetative stage, the cannabis plant isn’t sensitive to a specific light schedule to stay in veg. It just needs a long light period to signal that it’s “summer” and time to grow, grow, grow.
- 18/6 Light Cycle: This is the most common schedule. It means 18 hours of light on and 6 hours of darkness. This gives the plant plenty of energy to grow while also providing a “rest” period, which some growers believe is beneficial for root development.
- 24/0 Light Cycle: Some growers opt for 24 hours of continuous light, arguing it maximizes growth. The trade-off is higher energy costs and no rest period for the plant.
The key takeaway I found is that as long as the plant gets more than about 14-16 hours of light per day, it will remain in the vegetative stage. The 18/6 schedule seems to be the gold standard for balancing vigorous growth with energy efficiency.
How Far Should My Grow Light Be From My Weed Plant?
This was another one of my immediate questions. If the light source is food, shouldn’t it be as close as possible? The answer is a firm “no.” Too close, and you can cause light burn, which stresses the plant and damages the leaves. Too far, and the plant will stretch itself out trying to get closer, resulting in a tall, skinny plant with weak stems.
The correct distance depends entirely on the type and power of your light. A high-powered HPS light needs to be much further away than a lower-wattage LED panel. The best advice I’ve found is to always check the manufacturer’s recommendation first. They will usually provide a suggested height for the vegetative stage. A common low-tech method is the “hand test”: place your hand, palm down, at the top of your plant’s canopy. If the light feels uncomfortably hot on the back of your hand, it’s too close to the plant.
Finding the Sweet Spot: Temperature and Humidity for a Happy Plant
Just like us, plants have a comfortable temperature range. For the cannabis vegetative stage, you’re aiming for a “Goldilocks zone” – not too hot, not too cold.
- Temperature: The ideal range is generally between 70−85°F (22−29°C).
- Humidity: Young vegetative plants enjoy a bit more moisture in the air. A relative humidity (RH) level of 40-60% is a great target.
If the room is too hot and dry, the plant will struggle. If it’s too cold and damp, you’re inviting problems like mold and slow growth. Maintaining good airflow with a small oscillating fan is also crucial. It helps strengthen the plant’s stems and prevents pockets of stale, humid air from forming around the leaves.
What’s on the Menu? A Beginner’s Look at Plant Nutrients
I’m going to be honest: the world of plant nutrients is a massive rabbit hole I’m still trying to wrap my head around. There are countless brands, bottles, and schedules. But for us beginners, we can simplify it.
The main thing to know is that during the vegetative stage, the cannabis plant is very hungry for Nitrogen (N). Nitrogen is the primary nutrient responsible for creating chlorophyll and fueling leafy, green growth – exactly what we want during veg. Most nutrient lines designed for cannabis will have a “Grow” or “Veg” formula that is high in Nitrogen.
A huge question I had was, “When do I start feeding?” Many potting soils come pre-loaded with enough nutrients to last the first few weeks. A common piece of advice is to wait until the plant has 3-4 sets of true leaves before introducing any liquid nutrients. And when you do start, begin with a half or even a quarter dose of the recommended amount to avoid “nutrient burn,” which can damage your young plant. You can always give it more later, but you can’t take away what’s already been given.
Veg Stage Cheat Sheet
- Light Cycle: 18 hours on, 6 hours off (18/6) is the standard.
- Temperature: Keep it comfortable, between 70−85°F (22−29°C).
- Humidity: Aim for 40-60% relative humidity.
- Key Nutrient: Nitrogen (N) is the star player for leafy growth.
- Motto: Start low and go slow with nutrients.
How Long Does the Cannabis Vegetative Stage Last?
This is one of the first practical questions I typed into a search engine. I wanted a clear number – three weeks? Six weeks? A Tuesday in August? The truth, I quickly learned, is that there’s no single correct answer. For an indoor grow, the length of the vegetative stage is almost entirely up to you, the grower. You are the director of this show. This phase can last anywhere from a couple of weeks to several months. The decision of when to switch to the flowering stage depends on a few key factors you can control.
The “It Depends” Answer: Strain, Space, and Your Goals
When you ask an experienced grower how long to veg for, their answer will almost always start with “Well, it depends…” After digging in, I found it mostly depends on these three things:
- Strain: The genetics of your cannabis seeds play a big role. Some strains, particularly Sativa-dominant ones, are programmed to grow tall and lanky. They can double or even triple in height after you switch them to the flowering stage. Indica-dominant strains tend to grow shorter and bushier. So, you might give an Indica a longer veg time to fill out its space, while you’d switch a stretchy Sativa sooner to avoid it outgrowing your tent.
- Space: This is a big one for home growers. You can’t grow a six-foot-tall plant in a five-foot-tall grow tent. You have to end the vegetative stage while the plant is still small enough to accommodate its “flowering stretch” without hitting the light.
- Your Goals: Are you trying to grow one massive plant to fill a big tent (a longer veg time)? Or do you want to grow several smaller plants for a quicker turnaround (a shorter veg time)? Your personal goals for the harvest will guide your decision.
The Big Question: Does Vegging Longer Actually Increase Yield?
This was the first “pro tip” I came across in my research: “Veg longer for bigger yields!” It makes sense on the surface – a bigger plant should produce more bud, right? The general principle is true: a larger, more mature plant has a more extensive root system and more branches, which means more potential bud sites. A well-developed canopy can capture more light energy to fuel the formation of buds.
But I also dug into forums and guides to find a more nuanced answer for us beginners. The key discovery was that there’s a point of diminishing returns. A plant that has vegged for too long in a confined space can become a crowded, unmanageable jungle. This can lead to poor airflow and prevent light from reaching the lower branches, potentially hurting your final harvest more than it helps. The goal isn’t just a big plant; it’s a healthy and efficient plant. For a first-timer, a shorter veg time that results in a manageable plant is often a better path to success.
Average Veg Time for an Indoor Grow: What I’m Planning For
So, what’s a typical timeframe? For most indoor growers, the vegetative stage lasts between 3 and 8 weeks. This wide range accounts for all the variables we just talked about.
For my first grow, my plan is to aim for about 4-5 weeks of veg. My goal isn’t to set any world records. It’s to grow a manageable, healthy plant that fits comfortably in my space and allows me to learn the entire process from start to finish. I’d rather have a successful harvest from a medium-sized plant than get overwhelmed trying to manage a monster on my first try.
Training and Maintenance (The Stuff I’m Researching So I Don’t Mess Up)
Up until now, most of our job as growers has been to set up a nice environment and then let the plant do its thing. This next part is where it feels a bit more hands-on, and frankly, it’s the part I’m most nervous about messing up. Plant training and maintenance involve actively shaping and pruning your plant. The goal is to create a better structure for light absorption and airflow, which can lead to a healthier plant and a better harvest. After a lot of reading, I’ve decided to focus on the simplest, lowest-risk techniques for my first go.
My Intro to Low-Stress Training (LST) for Scaredy Cats Like Me
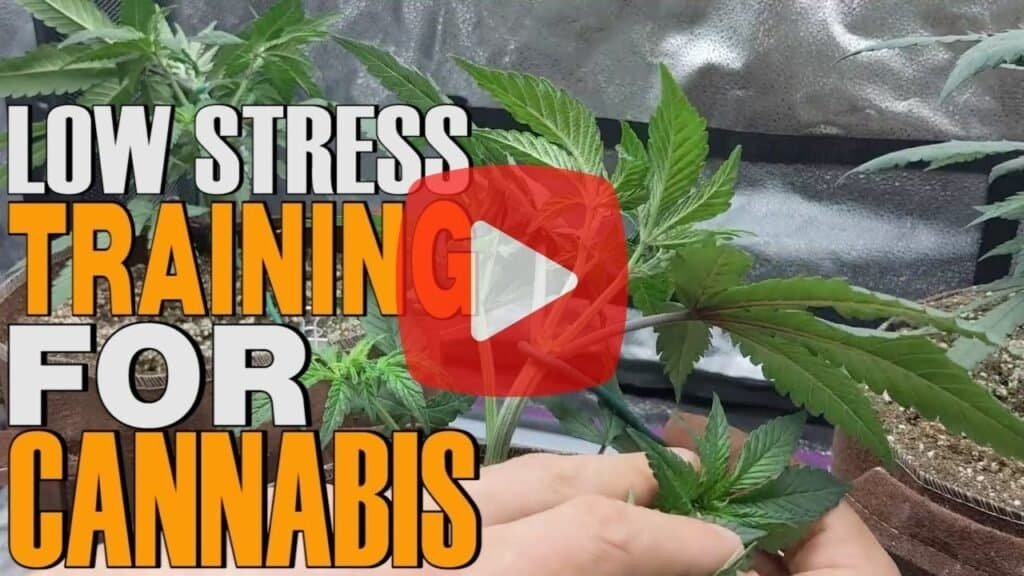
I saw the acronym “LST” everywhere on growing forums and immediately imagined some kind of complicated plant surgery that I was not qualified to perform. I was so relieved to find out it’s just… gently tying branches down. That’s it. That’s why it’s called Low-Stress Training.
Here’s the simple concept I’m planning to try: a cannabis plant naturally wants to grow like a Christmas tree, with one main stem shooting straight up and getting all the best light. LST is a way to break that habit. By gently bending the main stem over and tying it down so it’s parallel to the soil, you trick the plant. It redirects growth hormones to the lower branches, encouraging them to grow upwards as if they were the main stem. This creates a wider, flatter, and more even canopy where many more bud sites get access to direct light, instead of just the one at the very top. It’s a super beginner-friendly way to potentially increase your yield without picking up a pair of scissors.
To Prune or Not to Prune: A First-Timer’s Dilemma
This brings us to the great debate for new growers: should you start cutting leaves off your plant? This practice, often called defoliation, involves selectively removing some of the large fan leaves.
- The Argument FOR Pruning: Removing a few large fan leaves that are acting like umbrellas can uncover lower bud sites, allowing them to receive more direct light. It also increases airflow through the dense parts of the plant, which can help prevent issues like mold.
- The Argument AGAINST Pruning: Every leaf is a solar panel that stores energy for the plant. Removing too many can stress or shock the plant, slowing down its growth. And once you cut a leaf, you can’t put it back.
My research has led me to a clear conclusion for my first grow: less is more. I’m going to avoid any heavy pruning. If a giant leaf is clearly shading two or three promising-looking growth tips below it, I might tuck it out of the way. If tucking doesn’t work, I might consider removing that one leaf. But I’m definitely going to resist the urge to go crazy with the scissors until I have a better feel for how the plant responds.
Common Problems I’m Learning to Avoid
Part of maintenance is just keeping an eye out for trouble. Based on what seems to trip up most beginners, here are the top three issues I’m learning how to spot and prevent:
- Overwatering: This is apparently the #1 rookie mistake. We love our plants, so we want to give them everything they need, but too much water can drown the roots. The key advice I see everywhere is to let the pot dry out between watering. An easy way to check is to lift the pot – it will feel significantly lighter when it’s dry.
- Pests: A clean growing area is the best defense. I’m learning to keep an eye out for tiny unwelcome guests like spider mites or gnats, especially on the undersides of the leaves. Catching them early is critical.
- Nutrient Burn: We touched on this before, but it’s worth repeating. The tell-tale sign is yellow or brown “burnt” tips on the leaves. It’s a sign you’ve been a little too generous with the nutrients. The “start low and go slow” mantra is the best way to avoid this.
Transitioning to the Flowering Stage
After several weeks of explosive green growth, there comes a point when you, the grower, get to make a pivotal decision. It’s time to tell your plant that summer is ending and it’s time to stop growing and start flowering. This transition is arguably the most exciting moment for an indoor grower, as it marks the beginning of the end-goal: producing buds.
Reading the Signs: Is Your Plant Ready to Flower?
Before you “flip the switch,” you want to make sure your plant is mature enough to handle it. A plant switched to flower too early will produce a very small yield. A key sign of maturity I’ve learned about is seeing “alternating nodes” on the stem – this is when the branches start growing one at a time from the main stem, rather than in symmetrical pairs. You may also see “pre-flowers,” which are tiny, early versions of the final flower. On a female plant, this will look like a single white hair (a pistil) emerging from a node. Seeing these signs means your plant is sexually mature and ready for the signal.
Flipping the Switch: How to Initiate the Flowering Phase
For most cannabis strains (photoperiod strains), the signal to start the flowering stage is a change in the light cycle. Specifically, the plant needs a long, uninterrupted period of darkness every day.
The industry standard to initiate flowering is to change your light timer to a schedule of 12 hours of light and 12 hours of darkness. This 12/12 cycle mimics the shorter days of late summer and fall, telling the plant it’s time to reproduce. The “uninterrupted darkness” part is critical. Light leaks during the dark period can stress the plant and confuse it, so you want to make sure your grow space is completely sealed from any outside light.
Frequently Asked Questions (FAQ)
As I was doing my research, a lot of the same questions kept popping up. Here are the simple answers I’ve found for some of the most common ones.
What’s the difference between the vegetative stage and the flowering stage?
The vegetative stage is the “growth” phase, where the plant focuses on developing its leaves, stems, and roots under a long light cycle (like 18/6).
The flowering stage is the “budding” phase, where the plant produces its flowers (buds), which is triggered by a short light cycle (12/12).
Can I speed up the vegetative stage?
While you can’t defy biology, you can ensure your plant grows as fast as possible by providing an optimal environment: strong light, perfect temperature and humidity, and the right nutrients.
However, the only way to truly “speed up” the process is to simply switch to the 12/12 light cycle sooner. This will result in a much smaller plant and, consequently, a smaller harvest.
My cannabis plant is growing too tall, what should I do?
This is a great time to use the Low-Stress Training (LST) we talked about earlier! Gently bending the tallest branch down and tying it in place will even out the canopy and control the height without damaging the plant.
It’s the safest method for beginners to manage a plant that’s getting too tall for its space.
What happens if I accidentally give my vegging plant only 12 hours of light?
If it only happens for one day, don’t panic. A single short day usually isn’t enough to trigger the flowering process. Just switch your timer back to 18/6 the next day and the plant should stay in veg.
Consistency is the key; a plant generally needs several days of the 12/12 signal before it begins to transition.
So there you have it – everything I’ve managed to learn so far about the cannabis vegetative stage. It’s not nearly as complicated as it first seemed. When you boil it all down, this phase is all about building a strong, healthy, and leafy factory that’s ready to do the hard work of producing medicine during the flowering stage.
This deep dive has made me feel way more prepared and a lot less intimidated to get my own grow started, and I truly hope reading through my notes has done the same for you. We’re figuring this out together, one stage at a time.
Do you have a question my research didn’t cover? Or a tip you think a fellow new grower should know? Please drop it in the comments below! When you’re ready for the next step, join me as I dive into my research on the cannabis flowering stage.