Decoding the Autoflower Feeding Schedule: A First-Grow Guide to Nutrients
I’ll be honest. When I decided to grow my own medicine, I knew there would be a lot to learn. Lighting, training, soil types… each topic has its own learning curve. But one of the most important subjects I knew I had to research thoroughly was the autoflower feeding schedule.
The different charts and rows of nutrient bottles can look intimidating at first. My goal is to start my first grow on the right foot, and that means taking the time to understand what, when, and how much to feed the plant.
If you’re also doing your homework before you start planting, you’re in the right place. I’m not a master grower or a botanist. I’m just a fellow patient deep in the research phase for my first grow. This guide is my personal research log—the result of the hours I’ve spent sorting through all the information to demystify this one crucial topic. My hope is that we can both start our journey with confidence.
First Things First: Why Is a Nutrient Schedule a Big Deal for Autoflowers?
The Myth of “Just Add Water”
One of the first questions I had was, “Can you grow autoflowers without adding any nutrients?” It seems like a simple enough plant, right? Well, the answer is a classic “yes, but…”
Yes, you can technically grow an autoflower without adding liquid nutrients if you use something called a “super soil.” This is a type of soil that’s been carefully amended with all the organic nutrients the plant will need for its entire life. But for most first-time growers using a standard bag of potting mix, the answer is no. That soil only has enough food to get a seedling through its first couple of weeks.
I honestly hoped I could just buy a bag of soil from the hardware store and my work was done. I quickly learned that while an auto is a fast grower, it also gets hungry. To get a healthy plant, we need to be the ones to provide the food.
Why a Proper Feeding Schedule Helps Maximize Your Harvest
The main reason a good feeding schedule is so critical for autoflowers comes down to one thing: speed. These plants operate on a very tight deadline, often going from seed to harvest in just 8 to 10 weeks.
Unlike their cousins, photoperiod plants, which can stay in a vegetative stage for months if you want, an autoflower is on a fixed internal clock. There’s no “pause” button. This means if the plant runs into a nutrient deficiency during a critical week of growth, you can’t just give it an extra few weeks to recover. That window of opportunity is gone, which can lead to stunted growth or smaller yields.
Following a schedule helps ensure the plant gets what it needs, when it needs it, which is our best bet to promote good plant health and maximize your harvest.
Cracking the Nutrient Code: What Are We Actually Feeding Them?
Okay, so we know we need to feed our plants. But with what? When I first started my research, the labels on nutrient bottles felt like they were written in another language. But it turns out, the core concepts are actually pretty straightforward.
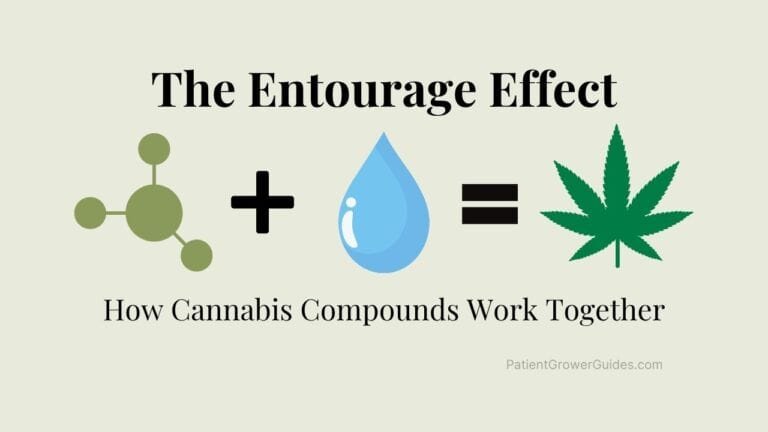
What the Heck is N-P-K?
I kept seeing “N−P−K” on every bag of soil and every bottle of “nutes” and felt like I was having a flashback to high school chemistry class. But here’s the simple breakdown I wish I’d had from the start.
N−P−K stands for the three main “macronutrients” a cannabis plant needs to thrive:
- N is for Nitrogen: Think of this as the “green growth” nutrient. It’s what the plant uses to build its leaves and stems. It’s the most important nutrient during the vegetative stage.
- P is for Phosphorus: This is all about roots and flowers. Phosphorus helps the plant develop a strong root system and is absolutely essential for producing dense buds during the flowering stage.
- K is for Potassium: This is the all-around health manager. It helps water move through the plant, strengthens it against stress, and supports all its major functions. Think of it as the plant’s immune system booster.
Different stages of the grow cycle require different ratios of these three nutrients, which is why you see different bottles for “Grow” and “Bloom.”
Choosing Your Path: Organic vs. Synthetic Nutrients
This was another big question for me. The two main type of nutrients you’ll encounter are organic and synthetic. Neither is definitively “better”; they’re just different approaches.
- Organic Nutrients: Think of this as feeding the soil, which then feeds the plant. These nutrients come from natural sources like worm castings, bat guano, or bone meal. They release slowly as microorganisms in the soil break them down. Many growers feel this approach is more forgiving and can lead to a better-tasting final product.
- Synthetic Nutrients: This is like feeding the plant directly with an IV drip. These are mineral salts that are refined to be immediately available for the plant to absorb. They offer more precise control and can lead to very fast growth, but it’s also much easier to go overboard and cause nutrient burn.
Liquid Nutes vs. Dry Amendments
You’ll also see nutrients in two primary forms:
- Liquid Nutes: This is the most common form for beginners. You mix a measured amount of the liquid into your water before you feed your plants.
- Dry Amendments: These are powders you either mix into your soil before you plant or sprinkle on top of the soil later in the grow (called “top dressing”). They are typically organic and release nutrients slowly every time you water.
A Simple Autoflower Feeding Schedule (From My Research)
Alright, this is the main event. Now, a quick but important disclaimer: every cannabis strain is a little different, and your specific growing environment (light, temperature, soil) plays a huge role. Think of this schedule not as a rigid, set-in-stone law, but as a general roadmap that I’ve pieced together from dozens of guides. The most important thing is to learn how to watch your plant for clues.
A General Autoflower Feeding Chart for Your First Grow
|
Week |
Stage |
What to Feed |
Strength |
Key Goals & Notes |
|---|---|---|---|---|
|
1-2 |
Seedling Stage |
Plain, pH-balanced water only. |
N/A |
Do not feed! The seedling is very fragile and gets all its food from the soil. Your only job is to provide light and not overwater. |
|
3 |
Early Vegetative |
Introduce “Veg” Nutrients (High in Nitrogen – N) |
START HERE: Begin with 1/4 of the recommended dose on the bottle. |
This is the first feeding. The goal is to encourage strong leaves and stems. Watch the plant’s reaction closely. |
|
4 |
Late Vegetative |
Continue with “Veg” Nutrients. |
If the plant looks happy, you can increase to 1/2 of the recommended dose. |
The plant should be growing quickly now. Keep an eye out for the first signs of tiny white hairs (pistils), which signals the start of flowering. |
|
5 |
Transition to Flower |
Switch to “Bloom” Nutrients (High in Phosphorus – P & Potassium – K) |
Drop back to 1/4 or 1/2 dose to introduce the new formula gently. |
The plant is “stretching” and its dietary needs are changing. It now needs food to form buds, not just leaves. |
|
6-9 |
Full Flowering |
Continue with “Bloom” Nutrients. |
Slowly increase from 1/2 to 3/4 dose. Avoid the full recommended dose. |
This is when the buds get bigger. This is also when the plant is hungriest. Always watch the leaf tips for any sign of nutrient burn. |
|
10 |
Late Flower / Flush |
Stop all nutrients. Plain, pH-balanced water only. |
N/A |
For the last 1-2 weeks, you “flush” the soil of any built-up salts. This is said to improve the final taste and smoothness of the flower. |
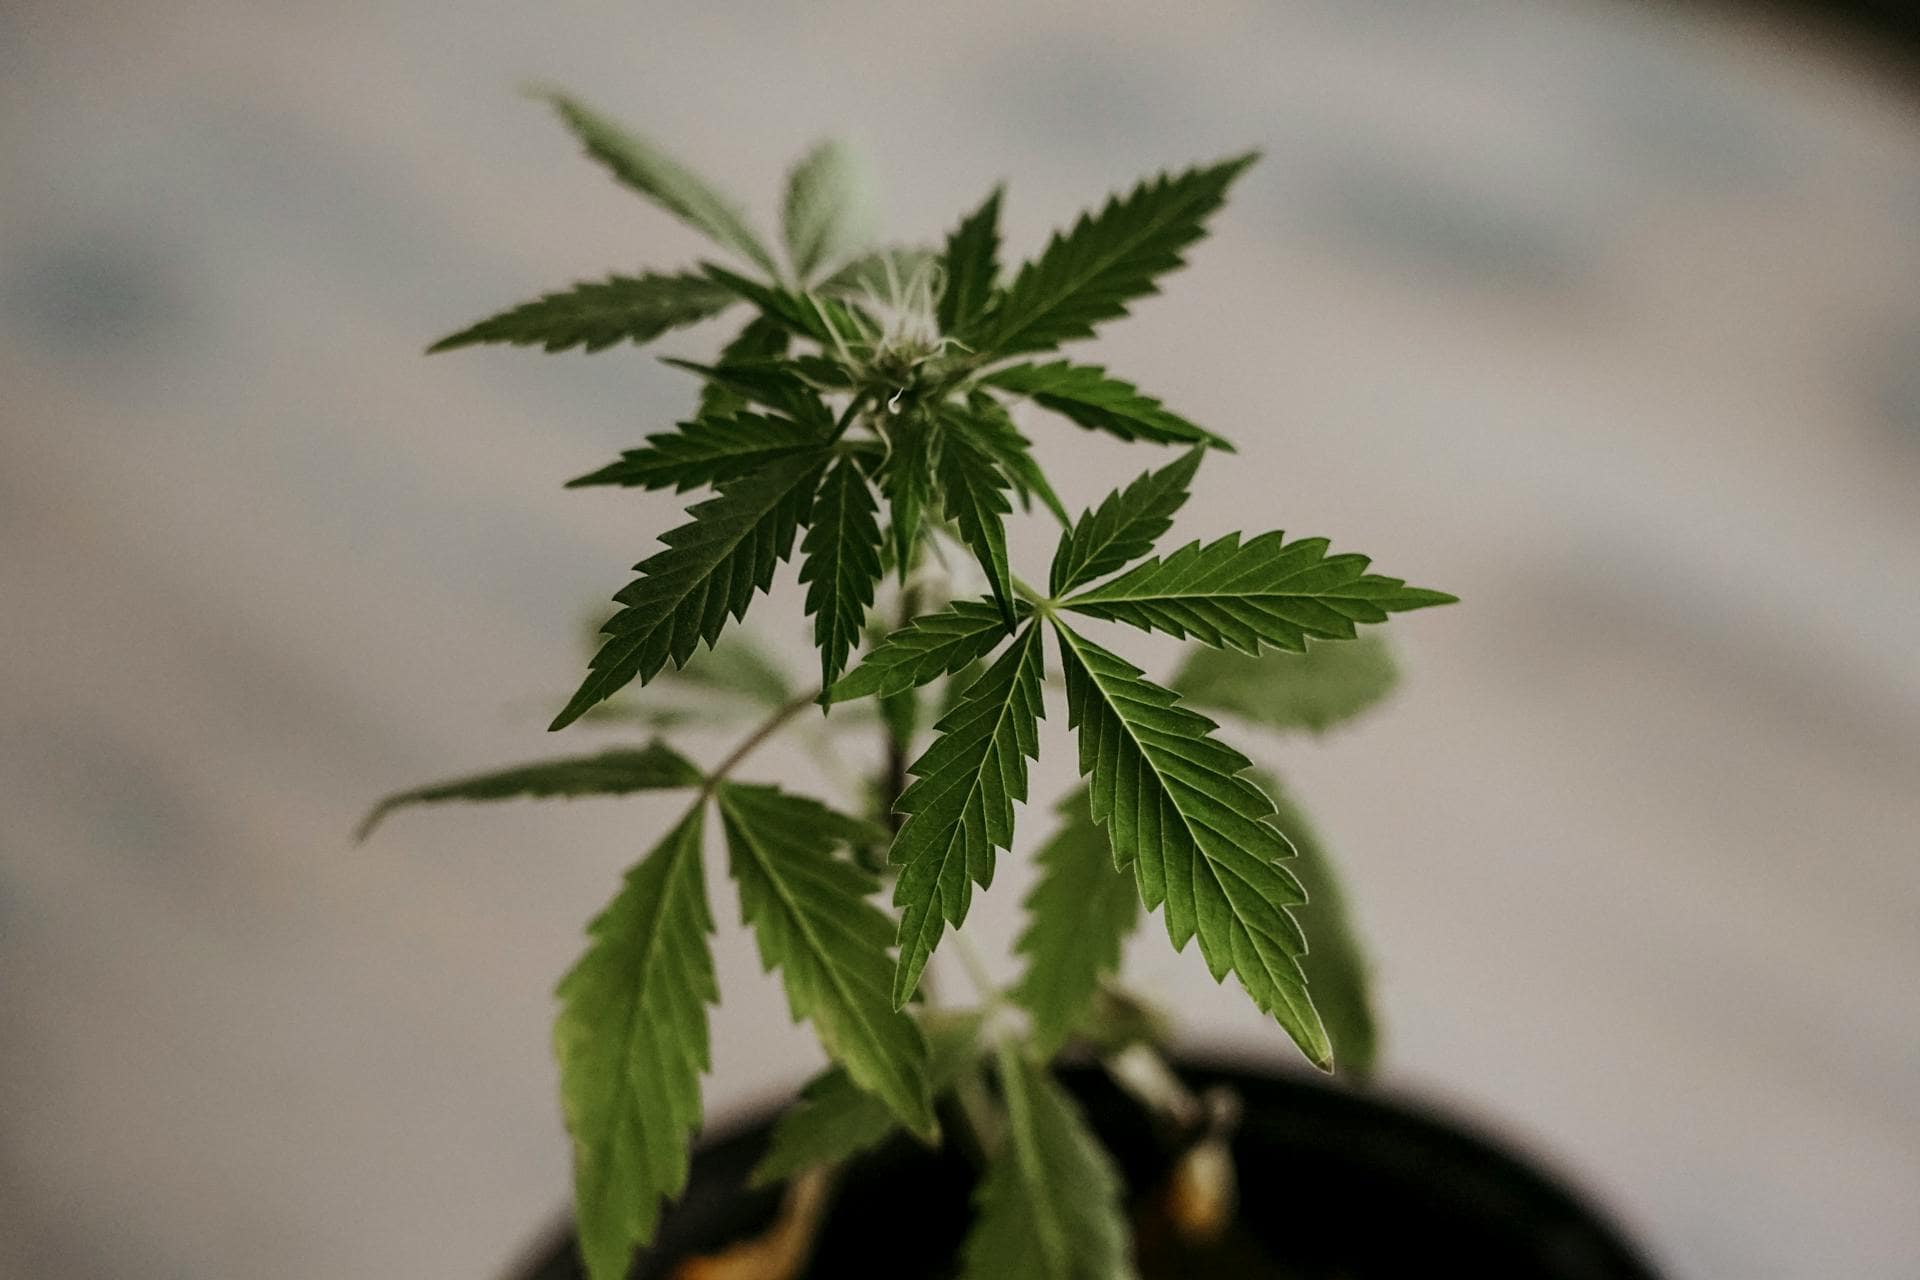
Weeks 1-2: The Seedling Stage (Patience is Key!)
When your autoflower first sprouts, it is a tiny, delicate seedling. My first instinct was to start feeding it right away to help it grow faster. I’m so glad I read that this is one of the quickest ways to stunt their growth or even kill it with kindness.
For the first week or two, the plant gets all the energy it needs from its first set of little round leaves (cotyledons) and the nutrients in the soil.
- Your Job: Do almost nothing! Provide light and water your plant only when the soil is dry to the touch.
- What to Feed: Plain, ph-balanced water. That’s it. No nutes yet.
Weeks 3-4: The Vegetative Stage (Time for Veg Nutes!)
Sometime during week 2 or 3, your plant will have developed a few sets of its iconic serrated leaves and will officially enter the vegetative stage. It’s now strong enough for its first real meal and is hungry for Nitrogen (N) to power its growth spurt.
- Your Job: Start introducing “Grow” or “Veg” nutrients.
- What to Feed: This is the most important rule in this entire guide: Start with 1/4 to 1/2 of the recommended dose listed on the nutrient bottle. You can always add more later; you can’t easily fix nutrient burn from overfeeding.
Weeks 5-9: The Flowering Stage (Introduce Bloom Nutrients)
Around week 5, you’ll start to see the first signs of the flowering stage—tiny white hairs (pistils) emerging at the nodes. This is the transition to flowering, and the plant’s dietary needs change. It needs less Nitrogen and a lot more Phosphorus (P) and Potassium (K) to start building buds.
- Your Job: Switch from your “Veg” nutes to your “Bloom” nutes.
- What to Feed: Start with your bloom nutrients, again at a 1/4 or 1/2 dose, and slowly work your way up as the plant matures. Some feeding schedules have a transition week where you mix both veg and bloom nutes, but for simplicity’s sake, a straight switch works too.
Week 10+: The Final Flush?
About one to two weeks before you plan to harvest, many growers perform a “flush.”
- Your Job: Stop using all nutrients entirely.
- What to Feed: Only give the plant plain, pH-balanced water. The goal is to wash out any leftover mineral salts from the soil and the plant itself, which many believe leads to a much smoother and better-tasting final product. While flushing is a debated topic (especially in organic growing), it’s a very common practice you should know about.
Key Takeaway: A Super Simple Schedule
- Weeks 1-2 (Seedling): Plain Water Only.
- Weeks 3-4 (Veg): Introduce Veg Nutes (High N) at 1/4 strength.
- Weeks 5-9 (Flower): Switch to Bloom Nutes (High P, K) at 1/4 to 1/2 strength.
- Week 10+ (Harvest Prep): Flush with Plain Water Only.
How Often Do You Feed Autos? (And Other Big Questions)
Okay, so we have a “what to feed” and a “when to feed,” but the next big puzzle for me was the “how often?” It turns out, you don’t just give the plant nutes every single time you water. That’s a fast track to problems.
Finding Your Rhythm: The “Feed, Water, Water” Method
So, how often do you feed your autoflowers? The most common advice I found for beginners is to avoid giving them nutrients with every single watering. This gives the plant a chance to use up the food you’ve already given it and helps flush out any excess mineral salts, which prevents nutrient burn.
A really simple, safe rhythm to start with is:
- Feed – Water – Water – Repeat
This means you’ll use your nutrient-mixed water once, and then for the next two waterings, you’ll use only plain, pH-balanced water. Some people do a “Feed – Water – Feed” rhythm, but the “Feed – Water – Water” approach is more cautious and forgiving for a first grow.
Are You Overfeeding? Signs of Nutrient Burn
In all my research, this was the #1 mistake new growers make. I was so paranoid about my plant going hungry that I almost went the other way. Learning to spot the early signs of overfeeding saved me from “loving” my plant to death.
Here are the classic symptoms of nute burn:
- Burnt Tips: The very tips of the leaves will turn yellow, then brown and crispy. This is the earliest and most common sign.
- Dark, Glossy Leaves: The leaves can turn a deep, waxy, dark green.
- The “Claw”: Leaves will curl downwards, making a shape like a talon or claw.
If you see these signs, especially the burnt tips, the solution is simple: ease up on the nutes and give only plain water for the next few waterings.
Reading the Leaves: Spotting Nutrient Deficiencies
While we’re more likely to overfeed our plants, it’s still good to know what a hungry plant looks like. Nutrient deficiencies can be a complex topic, but the most common one is easy to spot.
- Nitrogen (N) Deficiency: If you see the oldest, lowest leaves on your plant starting to turn yellow, it’s often a sign that the plant is hungry for Nitrogen. It’s pulling the mobile nutrient from its old leaves to send to its new growth.
The main goal isn’t to become an expert diagnostician overnight, but to get into the habit of looking at your plant every day. It will usually tell you exactly what it needs.
Answering Your Top Questions
As I was digging through forums and articles, a few of the same questions kept popping up. Here are my research-based answers to some of the most common ones.
Should I use nutrients every time I water?
Nope! We touched on this earlier, but it’s so important that it’s worth repeating. Using nutrients every time you water is one of the fastest ways to cause nute burn. It’s much safer to adopt a rhythm like “Feed-Water-Water” to give your plant a break and allow it to use the food you’ve provided.
What does Epsom salt (magnesium sulfate) do for autoflowers?
I saw this one everywhere. Epsom salt provides Magnesium (Mg) and Sulfur (S), two important micronutrients. Magnesium is a core component of chlorophyll, which lets the plant absorb light for energy. A lack of it can cause yellowing leaves. Honestly, for a first grow, this seems like a “use only if you need it” tool. Many quality soils and nutrient lines already have enough, so I don’t plan on adding it unless my plant shows clear signs of a deficiency.
Do autos need nitrogen during the flower stage?
Yes, but in much smaller amounts. During the flowering stage, the plant’s main focus shifts to using Phosphorus (P) and Potassium (K) to grow buds. However, it still needs a little bit of Nitrogen (N) to maintain its fan leaves and overall plant health. That’s why you’ll notice that “Bloom” nutrient formulas don’t eliminate nitrogen completely; they just reduce it significantly.
How do I maximize my autoflower yield?
This is the big one, isn’t it? From what I’ve gathered, there’s no single magic bullet. The way to maximize your harvest is by consistently getting all the fundamentals right. A proper feeding schedule is a huge piece of that puzzle—avoiding the stress of overfeeding or underfeeding allows the plant to reach its full genetic potential. Strong lighting and starting with good quality autoflower seeds are just as critical.
When should you start adding nutrients to an autoflower?
You should start adding nutrients to your autoflower around week 2 or 3, once it has developed 3-4 sets of true leaves. Before this point, the seedling is too delicate and gets everything it needs from the soil, so feeding it early can easily cause nutrient burn.
My Final Thoughts on Feeding Autoflowers
Whew. We’ve covered a lot of ground, from decoding N-P-K to figuring out a weekly schedule. After all this research, a couple of core ideas have really stuck with me as I prepare for my own grow.
The “Less Is More” Golden Rule
The biggest fear for a new grower is often, “Am I starving my plant?” But the far greater danger, from everything I’ve read, is overfeeding. It is so much easier to fix an underfed plant (by simply giving it more food) than it is to save a plant suffering from nute burn, which can permanently stunt their growth.
So, if you remember nothing else, remember this: start with 1/4 or 1/2 of the recommended nutrient dose. Always. When in doubt, just use plain water for that feeding. You can’t go wrong with being cautious.
Your Plant Is the Real Teacher
This guide, and any feeding chart you find online, is just that—a guide. It’s a starting point, not a set of unbreakable laws. The real skill in growing, and the part I’m most excited to learn, is observing the plant itself.
Get into the habit of looking at your plant every day. Are the leaves a healthy green? Are they pointing up towards the light? Or are they drooping and showing yellow tips? The plant will give you signals. Our job, as patient growers, is to learn its language.